SINGER® Flower Stitch Attachment

sku 2500261.01
$39.99

$49.99 MSRP

Free Shipping on Machines and orders over $35. Free returns through January 2025.

Creates unique flower-inspired circular designs. Add embellishments to garments, button covers, craft projects, and more!
Highlights

Details

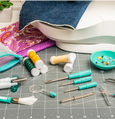
The Flower Stitch Attachment is used to create unique flower-inspired circular designs. Use your sewing machine’s decorative stitches to create flowers or the perfect circle! Add embellishments to garments, button covers, craft projects and more!


Creating Flower Designs

Various size circles may be achieved by adjusting the prong with the (-) and (+) markings. To adjust the size, first loosen the screw, move the disk to the desired setting, then re-tighten the screw. You can also experiment with different size zigzag stitches and the same circle size. Test different stitch width settings for whole new looks.


Concentric Circles:

Set the center prong toward the (+) and sew the outside circle using the desired stitch. Raise the needle and presser foot lifter. If desired, change the thread color. Loosen the adjusting screw, then set the prong toward the (-) sign, then re-tighten the screw. Lower the presser foot lifter, then sew the inside circle.


Appliqué:

Bring your appliques to life by adding decorative circular embellishments. Prepare appliqué shapes and fuse them to the foundation fabric with double-sided fusible web. Choose your stitch, then set the circle size as desired. Sew the circular pattern in the center of the appliqué. Experiment with various types or weights of threads for a dimensional appearance.


Covered Buttons:

Wonder what to do with all those fabric scraps? Make covered buttons! Self-covered button kits are available in a variety of sizes and shapes.


Embellishment:

Embellish fabric scraps before applying the to the button cover. Depending on the fabric used, you may wish to use a fusible a fabric interfacing before stitching. Try different decorative stitch patterns for unique effects.


Twin Needle:

Try using a twin needle with two different thread colors. Place one thread on the standard spool pin and the other on the auxiliary spool pin or cone stand. Because the twin needle is wider than a single needle, a narrower stitch width may need to be used.


Tips

  • The existing presser foot and shank need to be removed from the machine before attaching the Flower Stitch Attachment.
  • Be sure that you have a full bobbin in the machine and the needle is raised to its highest position. You can only access a drop in bobbin with the Flower Stitcher unattached.
  • Depending on machine model, lower the feed dogs or cover them. (See machine manual for more information.
  • Start with a zigzag stitch to learn how to use the Flower Stitch Attachment. Then, you can experiment with other decorative stitches.
  • Stabilizer under your fabric can help the stitches stay smooth and prevent puckering.
  • Try different weights of thread. You may need to change your stitch length based on the weight thread you are using.

Machine Compatibility

Product Details

The Flower Stitch Attachment is used to create unique flower-inspired circular designs. Use your sewing machine’s decorative stitches to create flowers or the perfect circle! Add embellishments to garments, button covers, craft projects and more!


Creating Flower Designs

Various size circles may be achieved by adjusting the prong with the (-) and (+) markings. To adjust the size, first loosen the screw, move the disk to the desired setting, then re-tighten the screw. You can also experiment with different size zigzag stitches and the same circle size. Test different stitch width settings for whole new looks.


Concentric Circles:

Set the center prong toward the (+) and sew the outside circle using the desired stitch. Raise the needle and presser foot lifter. If desired, change the thread color. Loosen the adjusting screw, then set the prong toward the (-) sign, then re-tighten the screw. Lower the presser foot lifter, then sew the inside circle.


Appliqué:

Bring your appliques to life by adding decorative circular embellishments. Prepare appliqué shapes and fuse them to the foundation fabric with double-sided fusible web. Choose your stitch, then set the circle size as desired. Sew the circular pattern in the center of the appliqué. Experiment with various types or weights of threads for a dimensional appearance.


Covered Buttons:

Wonder what to do with all those fabric scraps? Make covered buttons! Self-covered button kits are available in a variety of sizes and shapes.


Embellishment:

Embellish fabric scraps before applying the to the button cover. Depending on the fabric used, you may wish to use a fusible a fabric interfacing before stitching. Try different decorative stitch patterns for unique effects.


Twin Needle:

Try using a twin needle with two different thread colors. Place one thread on the standard spool pin and the other on the auxiliary spool pin or cone stand. Because the twin needle is wider than a single needle, a narrower stitch width may need to be used.


Tips

  • The existing presser foot and shank need to be removed from the machine before attaching the Flower Stitch Attachment.
  • Be sure that you have a full bobbin in the machine and the needle is raised to its highest position. You can only access a drop in bobbin with the Flower Stitcher unattached.
  • Depending on machine model, lower the feed dogs or cover them. (See machine manual for more information.
  • Start with a zigzag stitch to learn how to use the Flower Stitch Attachment. Then, you can experiment with other decorative stitches.
  • Stabilizer under your fabric can help the stitches stay smooth and prevent puckering.
  • Try different weights of thread. You may need to change your stitch length based on the weight thread you are using.