Product quantity cannot be greater than 99
Embroidery
-
SIY Sew It Yourself Tips & Hints Inspiration
Littlest Studio SE300 Impressions
It is such a fun process to see what you have imagined in your head stitch out on your fabric right before your eyes! Overall I’ve really enjoyed using this machine. I have so many projects planned for the future, and I can’t wait to share it all with you!

Hi Everyone!
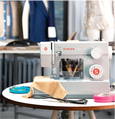
Really excited today to bring you my first impressions of the SINGER ® LEGACY™ SE300 Sewing Machine
First a few points about the machine:
It’s a combination embroidery machine and regular sewing machine. As far as operating as standard machine, it’s brilliant. Runs smooth, has tons of great features. But today I want to talk to you specifically about the embroidery function of this machine.
Now, I don’t have any experience with embroidery machines, but I have a passion for embellishments and knew that this was an avenue of sewing that I definitely wanted to explore.
First thing I did was watch a series of videos on the SINGER® Sewing Company youtube channel. I found these videos incredibly helpful. I’m a visual learner and while I can appreciate a user manual, these videos answered every question I had.
The SINGER ® LEGACY™ SE300 Sewing Machine comes included with embroidery design information sheets that tell you all the colours you need, stitching order, design sizes, etc. These are an incredibly useful reference tool.
Beside the information sheets, I plan on keeping a small journal of my embroidery journey. Writing down notes on designs, stabilizers, thread types, etc. I would love to include photos of the designs stitched out. There are so many different combinations, photos would be very helpful to look back on. I also think that having a little notepad would be a fun way to document what I’ve learned along the way!
I asked a friend who had some experience with embroidery and took her suggestion of using purchasing some thread design specifically for embroidery. I feel like it made a difference in the quality of the stitching!
*Another tip I have was to make sure to trim your jump stitches in between colour changes, this prevents possible thread tangles that could jam up your machine.
The entire process with very user friendly and made it easy to get started. After hooping up my fabric and stabilizer, I chose my design, thread up the first colour, and pressed start! It stitched through everything, telling me when to switch colours and when to trim threads.
It is such a fun process to see what you have imagined in your head stitch out on your fabric right before your eyes! Overall I’ve really enjoyed using this machine. I have so many projects planned for the future, and I can’t wait to share it all with you!
Make sure to follow along at www.thelittleststudio.com